13/10/2023
Choose your version Macro/Script CS2
We offer two versions of scripts to meet your needs in the best possible way. The first version is simpler and works by detecting specific keys. The second, more advanced, allows complete automation with the simple press of a single key.
Quick Start with the Key-Based Version
Discover how to maximize your experience using our key-based script version. This guide will take you through the steps needed to efficiently configure and use this version, allowing for more direct and personalized control

1
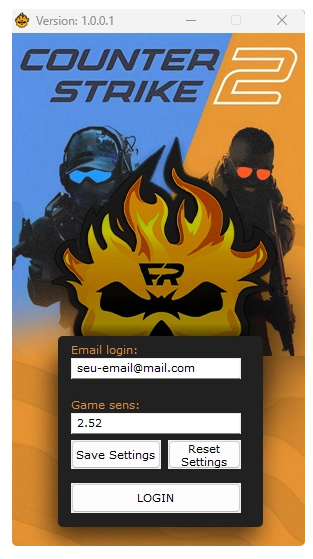
Enter Your Script
Use your receiving e-mail address to log in.
2
Definition of Sensitivity:
Adjust it to match that of CS2, ensuring a consistent gaming experience
3
Save and click on ``Login``
If this is your first login, your HWID will be registered. After registering, click on “Login” again. If everything is correct, the menu will be displayed.
1
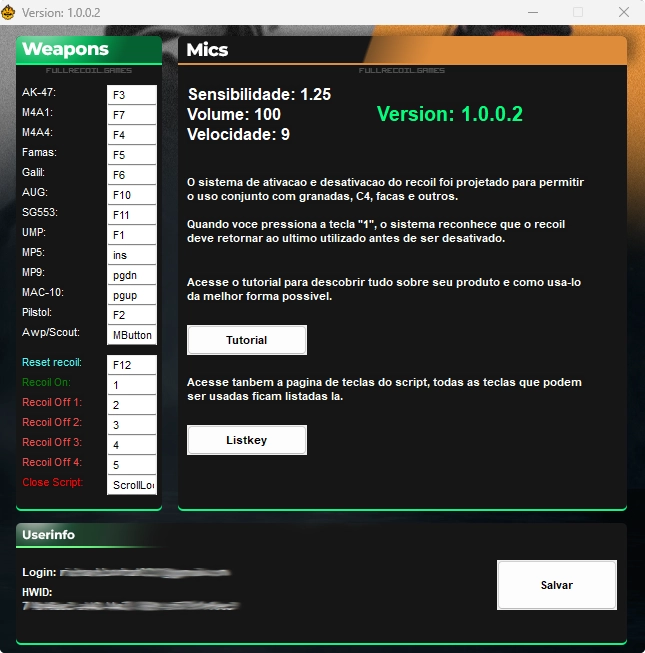
View your information
In the menu, you can check the keys assigned to each weapon. They are already preset, but you can change them to your liking
2
Change your information
In the sections to the left of the menu, you can customize all your settings. If you are in doubt about the name of any key, we have provided a button called ‘Listkey’ to help you configure it.

Quick Start with the Auto Detect Version
Explore the power and convenience of our script version with automatic detection. This guide is designed to walk you through the process of setting up and using this advanced version, which allows for a more automated experience at the touch of a key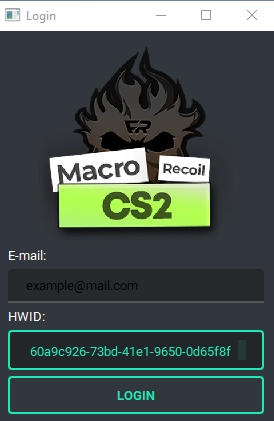
1
Enter Your Script
Use your receiving e-mail address to log in.
2
HWID
Your Hardware Identifier (HWID) will be displayed immediately below the login field. Think of it as a unique ‘password’ that is specific to your script
3
Salve e clique em ``Login``
Se for o primeiro login, seu HWID será registrado. Após esse registro, clique em “Login” novamente. Se tudo estiver correto, o menu será exibido.

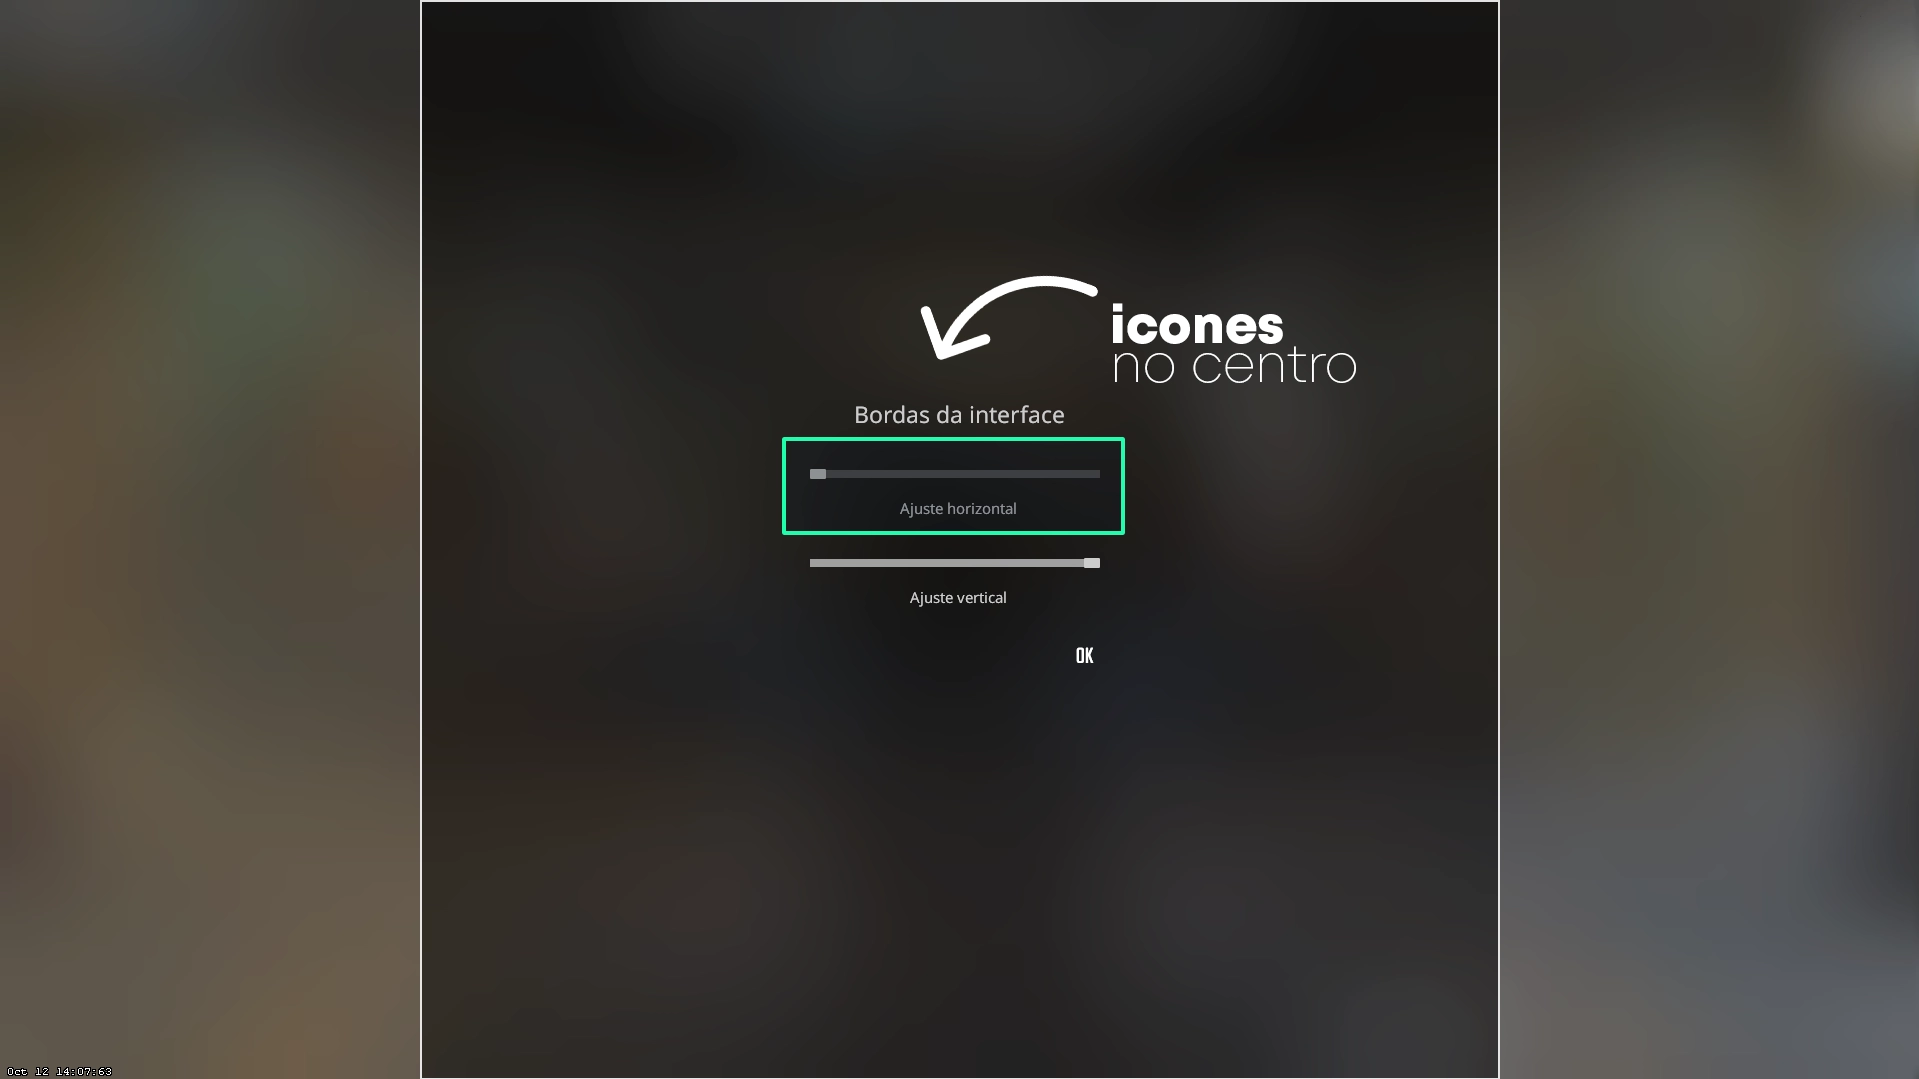
Capture configuration
To ensure that the user interface (UI) is centered, go to the game’s video settings and find the ‘Interface Borders’ option. Move the slider to the leftmost value. This will ensure the correct alignment of your UI
Interface size
To ensure the correct capture of weapons, it is essential that the interface is positioned over the weapon, thus avoiding an empty capture. To achieve this setting, set the interface size to 0.90

1
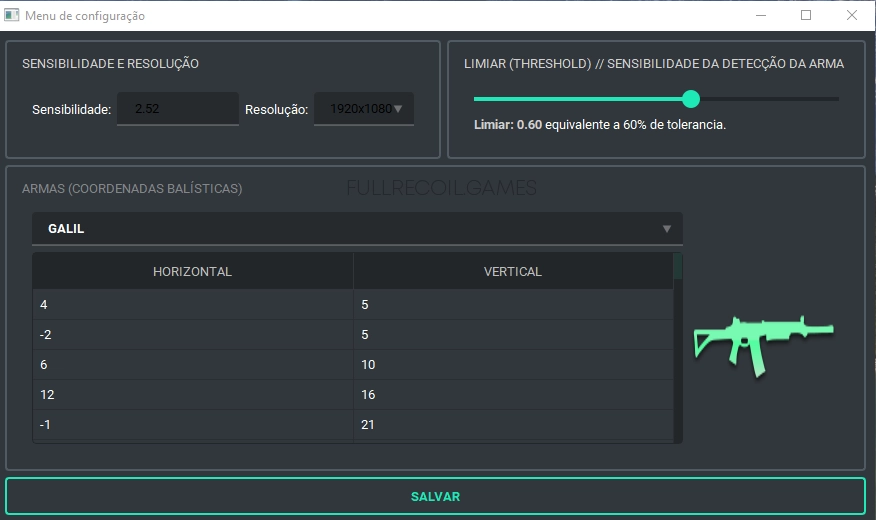
Sensitivity and Resolution
We recommend that you set the mouse sensitivity to match that used in the game itself. Currently, the supported resolution is FULL HD (1920×1080). We are working on making more resolution options available soon.
2
Threshold
This setting allows you to adjust the sensitivity of the weapon detection. A higher value increases the criteria for matching the weapon’s local image. In other words, the higher the value, the stricter the check will be to determine whether the displayed weapon matches the stored local image. Only change this parameter if you consider it necessary. Be careful when setting values too high, as this can result in the weapon not being detected
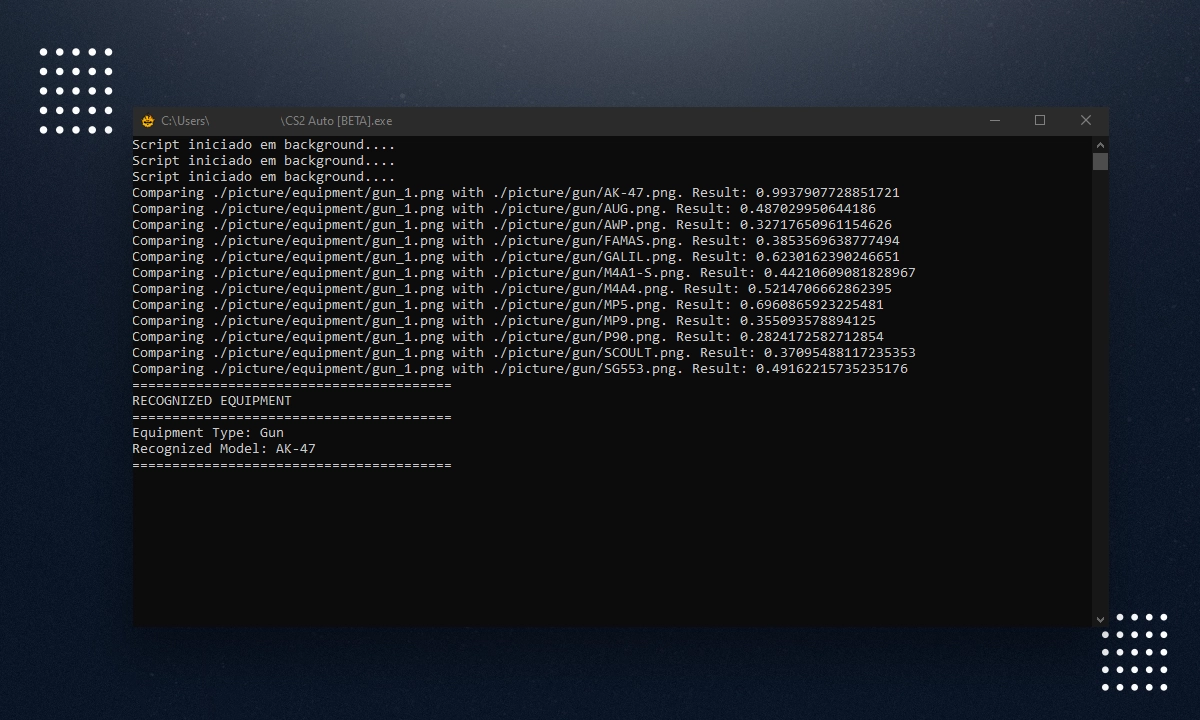
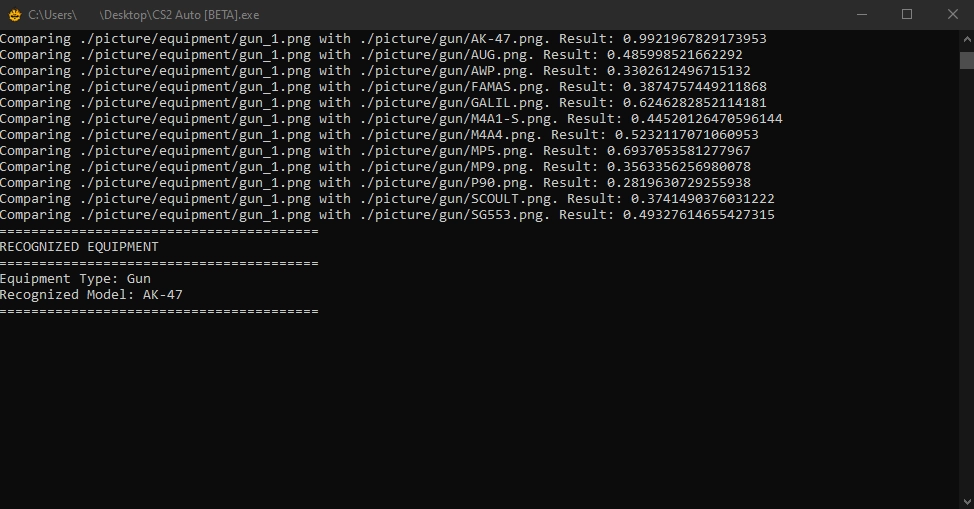
CMD para visualização da detecção das armas

Capslock
After properly configuring your game, you can activate the script by pressing the ‘CAPS LOCK’ key. The script will automatically identify the weapon you want to use and display a notification indicating which weapon has been detected

Sound for dectection
With each weapon detection, the script will emit an audible notification indicating which weapon has been recognized. If you wish, you can adjust or mute this sound alert via the Windows Volume Mixer